
Capture The Movement of The Stars Across Night Sky Like A Pro
Traditionally, shooting star trails with film-based cameras relied on shutter speeds of minutes or even hours to capture the movement of the stars across the night sky. But these exposure times will produce too much noise on digital cameras, so it’s better to shoot a sequence of images using a much shorter shutter speed, then combine them later on.
The other big advantage with this is that unlike many other techniques for shooting the stars, you can get great star-trail images even when there’s some light pollution. Here are three basic steps you need to follow…
1. Get Steady With Your Tripod
To capture significant trails with a wide-angle lens, you’ll need to keep shooting for around 15 minutes, which will be 30 exposures of 30 seconds each. The longer you shoot for, and the more exposures you take, the longer the star trails will be in your final image.

Once you’ve taken your star-trail images, you also need to take a dark frame. This is a shot taken using exactly the same shutter speed, ISO and aperture as your main images, but with the lens cap in place. This dark frame is used when you combine the shots together to reduce noise and the visibility of any ‘hot pixels’, which will produce white dots in long exposure images. For this to work successfully, this needs to be taken immediately after your main images using the same settings.
2. Combine The Images
Once you’ve taken your sequence of images plus a dark frame, you need to combine them together to create the star-trail image. You can combine the individual shots as different layers in Photoshop or elements, then change the blending mode of all layers, apart from the bottom layer, to Lighten. Now load the dark frame on the top of the Layers stack, and change its blending mode to Difference.

This process is fine for a few images, but if you’ve taken 30 or more shots it’s a bit boring. The easiest way to combine lots of images is to use software to automate the process. One of the most popular is Startrails for Windows, available to download in the Software section at www.startrails.de. alternatively, there’s StarStaX, which is available for both Windows and Mac OS X via the Software section at http://www.markus-enzweiler.de/software/software.html
3. Point The Camera
Fix the camera in position, focused on the stars and ideally pointed close to the pole star. You can either use continuous shooting mode and lock the shutter release on your remote to take your images, or use an interval-o-meter programmed to take a sequence of images.
You May Want to See :
-
 Macro Photography Like A Pro
-
 Optimal Camera Settings For Wildlife Photography
-
 Essential Photography Tips & Tricks
-
 5 Things you should know before buying a camera
-
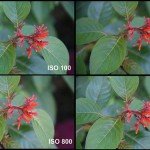 The relationship between ISO & image Noise
-
 SONY Alpha 7S II
-
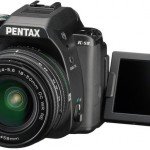 Pentax K-S2
-
 Leica S
-
 Canon Unveils Superzoom G3 X
-
 Three Essential Ways To Improve Composition
-
 Canon EOS 750D
-
 Sony Cyber-shot DSC RX100 IV
-
 Sony introduces A7R II
-
 Canon EOS 5DS R
-
 Canon EOS 760D
-
 Tips on Choosing the Right Telescope
-
 Starry Night Pro Plus 7
-
 The Sony Alpha System
-
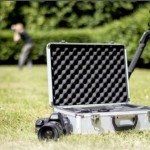 Build A DIY Lens Locker
-
 The Pentax DSLR System
-
 10 Ways to Win Photo Competitions


